This year the quilting group that meets at the Front Porch Quilt Shoppe in Ozark is doing the 20 Years of Kansas Trouble Quilting quilt. I'm using Kansas Trouble fabrics for my blocks, but I'm not using the featured fabrics. In fact, I'm using Bella Solid "Hay" for my background and sashing, which is a much darker fabric than what is featured in the directions, but I thought I wanted something that was a bit darker and richer than the cream. The darkness and richness of the fabrics is what I really like about Kansas Trouble fabrics, so I wanted to really embrace that in my quilt.
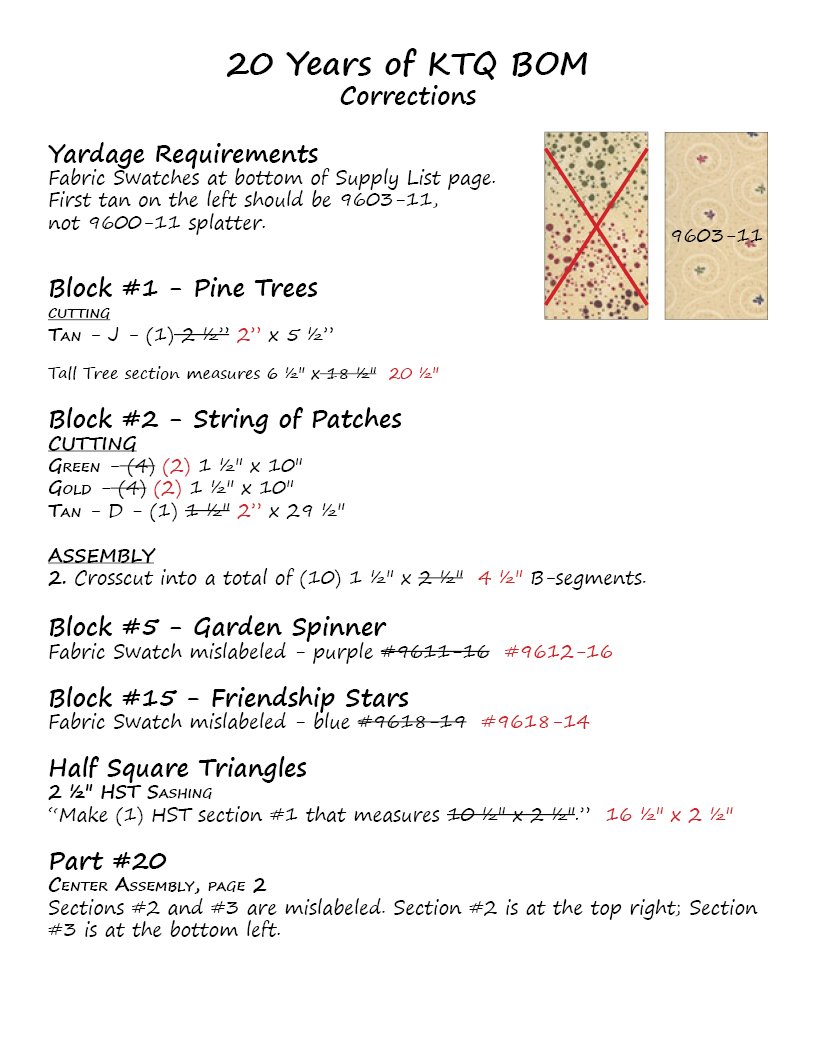
The pattern has some mistakes in it, but luckily they have posted some corrections on the KT Quilting website, so that is nice. I didn't have the corrections yet when I was sewing these blocks and it was triggering my anxiety a little bit. Hopefully that will ease off as I go.
Thursday, January 30, 2020
Pink and Purple Fat Quarter Rag Quilt
This is my second flannel fat quarter rag quilt for the church blanket drive. This quilt was a little bit more expensive than the Panda quilt because the FQ bundle cost about $32, but that is still very economical for quilt these day.
It is also the last one that I will make for this year's blanket drive. I have 2 more fat quarter bundles, but I don't plan to use them this time. It's been really fun, but I have some other projects that I need to focus on right now.
Fat Quarter Flannel Rag Quilt with Pandas
As I mentioned in the previous post, my church is donating blankets to the Child Advocacy Center again this year. Several people make the fringed fleece blankets for this project, and I have done that, too, in the past. However, I've read about how much micro-plastic fleece puts into the water supply and I decided that I wanted to do something different instead. I got the bright idea to make really simple rag quilts out of flannel fat quarters, and this was the result.
I ordered some flannel fat quarter bundles that each had 12 fat quarters. I paired up the fat quarters, put scrap batting in between them, quilted them, and sewed the units together. They take a bit longer to make than fleece blankets, and they are probably a little more expensive, but it was still really quick and economical to make. This fat quarter bundle was only about $25 and the batting was leftover scraps (some pieced together) that I was thinking about just getting rid of anyway, so that counts as free in my book. The white quilting thread was not very expensive either. It came from Walmart in a large spool.
I'm actually really happy with how it turned out. It gave me an opportunity to practice my free motion quilting, and I found that I really enjoy doing it. The resulting quilt is very soft and cozy. And I think that the fringe gives it a nice little bit of interest for a child to play with. I think it should be very comforting for the child who receives it.
I finished the sewing and the clipping on this one at the quilting retreat, too, but I wanted to wait until it was washed before I photographed it. Washing makes so much difference in the look of any quilt, but it is really essential for a rag quilt.
I ordered some flannel fat quarter bundles that each had 12 fat quarters. I paired up the fat quarters, put scrap batting in between them, quilted them, and sewed the units together. They take a bit longer to make than fleece blankets, and they are probably a little more expensive, but it was still really quick and economical to make. This fat quarter bundle was only about $25 and the batting was leftover scraps (some pieced together) that I was thinking about just getting rid of anyway, so that counts as free in my book. The white quilting thread was not very expensive either. It came from Walmart in a large spool.
I'm actually really happy with how it turned out. It gave me an opportunity to practice my free motion quilting, and I found that I really enjoy doing it. The resulting quilt is very soft and cozy. And I think that the fringe gives it a nice little bit of interest for a child to play with. I think it should be very comforting for the child who receives it.
I finished the sewing and the clipping on this one at the quilting retreat, too, but I wanted to wait until it was washed before I photographed it. Washing makes so much difference in the look of any quilt, but it is really essential for a rag quilt.
Saturday, January 18, 2020
Fantasy Land quilt
I finished the binding on this quilt at my guild's quilt retreat yesterday. I made the top so long ago that I don't even remember how long ago it was. I'm thinking it is at least 12 years old. It was definitely from before I started posting pictures of completed quilt tops and possibly from before I started this blog! I wanted to start the year off by tackling a UFO and this seemed like a good place to start.
I decided to try free-motion quilting it on my regular sewing machine. I have done some place-mats before but I don't think I've ever free-motioned a quilt before. It is far from perfect. In fact, I'm sure it can't even see perfect from where it is, but I'm good with how it turned out. I think it is very respectable for a first attempt at something of that size (33 inches square).
The fabric that I used was not a panel, but continuous yardage with sort of overlapping fantasy scenery. I fussy-cut the larger square that are in the corners and center of quilt and some of the smaller square that are in the border. These many years later when it was time to choose the fabric for the backing, I decided to cut out the largest piece that I could from the fantasy yardage to use on the back. I surrounded it with some light blue fabric that I had in my stash. I think it makes a nice back. It makes the quilt almost reversible, really. Here is the back:
My church is having a blanket drive to donate to the child advocacy center in few weeks. I am planning to donate this quilt as part of my offering.
A look back at 2019
So for 2019 I didn't really set any quilting goals, and it's probably a good thing. While I did accomplish some things in 2019, I felt like it was largely a lost year. My husband has been battling prostate cancer most of the year and that has taken a real toll on our time and energy levels. Surgery and radiation are now finished, and we are praying for good numbers and no need for further treatment going forward. There were also multiple trips to visit out of town and out of state family that also took up lots of time. I only had 31 posts on the blog in 2019, which was the lowest since
2012. I had trouble remember to post things even when I did find time
to do them.
That being said, here is what I did actually accomplish, creatively, in 2019:
I finished 8 quilts. Of those, I gave 4 away as gifts and donated another to charity.
I completed 4 quilt tops that didn't get finished. Two of which are quilted but still need to be bound.
I took a watercolor painting class and posted some watercolors that I did.
I got back into drawing, with pencil, and post some of that.
I tried my hand at pen & ink drawing, including doing the full marathon of Inktober! I only posted a handful of the drawings here.
Several of the posts were of the blocks I made for my Vintage Christmas wall hanging. And a few were of blocks for other projects. Some blocks were donated and one still sits in my sewing room as an orphan block. It was made for a design challenge we had in my quilt guild.
Not too bad for a "lost year." Here's to hoping 2020 will be better than 2019!
That being said, here is what I did actually accomplish, creatively, in 2019:
I finished 8 quilts. Of those, I gave 4 away as gifts and donated another to charity.
I completed 4 quilt tops that didn't get finished. Two of which are quilted but still need to be bound.
I took a watercolor painting class and posted some watercolors that I did.
I got back into drawing, with pencil, and post some of that.
I tried my hand at pen & ink drawing, including doing the full marathon of Inktober! I only posted a handful of the drawings here.
Several of the posts were of the blocks I made for my Vintage Christmas wall hanging. And a few were of blocks for other projects. Some blocks were donated and one still sits in my sewing room as an orphan block. It was made for a design challenge we had in my quilt guild.
Not too bad for a "lost year." Here's to hoping 2020 will be better than 2019!
Tuesday, November 19, 2019
Under the Sea
I finished the binding on this quilt on our trip down to the beach over the weekend. I'm calling it Under the Sea because of the mermaid fabric and wave-like design in the piecing. It is going to be a Christmas present for my 2-1/2 year old granddaughter. She loves to go swimming and playing in water, so hopefully she will appreciate the mermaid theme. The quilting is an all-over dolphin design done by the Gammill Girls at the Front Porch quilt shoppe.
Other than attaching a label to this quilt and the one for my younger granddaughter, I'm finished with my Christmas sewing for this year.
Monday, November 04, 2019
Something Blue
This quilt was a wedding gift for my other daughter who just got married on Saturday. I really cut it close getting this one done on time. I finished the binding and attaching the label on the day of the wedding about 4 hours before the ceremony was scheduled to start. The picture was taken on one of the double beds in my hotel room where we were staying for the wedding. I hate to be down to the wire like that, but sometimes it just happens.
I'm really happy that it was done in time. I believe she had the wedding photographer include it in some of the wedding pictures. They really seemed to like it. I'm happy about that, too.
Thursday, October 31, 2019
Inktober!
So this year I decided to take part in the online phenomenon that is Inktober. It is a challenge to make art, in pen and ink, everyday during the month of October. I had never done pen and ink drawing before, but I decided to give it a try anyway. The whole idea is for it to be a learning experience and I feel like it was for me. I enjoyed it, but it became something of a chore by the end.
Here are some of the highlights. (You can see them all at https://www.instagram.com/jcooper52371/ if you are interested.) Each day had a separate prompt.
Build (day 5)
Dragon (day 12)
Overgrown (day 14)
Tread (day 20)
Dizzy (day 24)
Injured (day 29)
Friday, October 11, 2019
Roll Tide, Baby!
I finished the binding on this one on our way home from the airport this week. It still needs a label. It is for my youngest granddaughter for Christmas. I'm calling it "Roll Tide, Baby!" because the border fabric has elephants on it and both my daughter and son-in-law graduated from the University of Alabama. It seemed appropriate for their daughter to have a "Roll Tide" quilt, even though it isn't overtly Alabama football themed. I figure she can use it while she's snuggled up on the couch watching football with her daddy, someday. She'll only be 1 year old at Christmas.
Friday, September 13, 2019
Cosmic Gyre
I finished the binding on this one last week, but I just got around to taking a picture of it today. It is the finished product of this quilt that I posted about back in February. The pattern is called Simplish and it is available for free from Shabby Fabrics.
I decided to name it Cosmic Gyre because of the circular motif and the colors in the fabric. Some of the fabrics made me think of the galaxy pictures I've seen. I also wanted to use a term that evoked circles without actually using the word circle. I decided on gyre because it means spiral (think gyrate), and Hozier uses the term in one of the songs on his newest album, so it was in my mind.
Autumn Breeze quilt top
This is my newest quilt design, which I'm calling Autumn Breeze. It uses a jelly roll of fabric along with a little bit of yardage for the pinwheels and borders. I actually drew up the design a few years ago, but I just got around to writing up the directions and actually piecing the quilt top. Once I get it quilted and bound I can get the pattern up and available in my Etsy shop.
The fabric I used is A New Leaf by Mitzi Powers for Benartex fabrics. I bought it back in 2014 (when I designed the quilt), so I doubt it's still available anywhere now. The fall colors and pinwheels combined give me the sense of a cooling Autumn breeze, thus the name. Unfortunately we still have temperatures in the 90s here in south Alabama. But it's nice to think about Autumn and cooler weather, even if you can't experience it, right?
Using a jelly roll can make for a rather busy quilt, but I think having the pinwheel blocks and border in the same color add a little continuity and calm it down a little. I'm pleased with how it turned out, although it was touch-and-go for a little bit there when I was putting it together. The border did make a big difference, in my opinion.
The finished size of the quilt will be 64" by 80". I'm thinking I will probably use it on the back of my couch during the fall. Maybe it won't be too big for my new, smaller, couch.
The fabric I used is A New Leaf by Mitzi Powers for Benartex fabrics. I bought it back in 2014 (when I designed the quilt), so I doubt it's still available anywhere now. The fall colors and pinwheels combined give me the sense of a cooling Autumn breeze, thus the name. Unfortunately we still have temperatures in the 90s here in south Alabama. But it's nice to think about Autumn and cooler weather, even if you can't experience it, right?
Using a jelly roll can make for a rather busy quilt, but I think having the pinwheel blocks and border in the same color add a little continuity and calm it down a little. I'm pleased with how it turned out, although it was touch-and-go for a little bit there when I was putting it together. The border did make a big difference, in my opinion.
The finished size of the quilt will be 64" by 80". I'm thinking I will probably use it on the back of my couch during the fall. Maybe it won't be too big for my new, smaller, couch.
Tuesday, August 27, 2019
Vintage Christmas Wallhanging
Here is my finished top for my Vintage Christmas wallhanging. All the embroidery is done on the blocks that called for it, too. I think it turned out nice, even though the 6-inch blocks were a real pain to make and keep to size.
As you can see from the picture above, I opted not to make the Twinkle Light border. It would have required me to make 44 individual 3-inch light bulb units and I just wasn't convinced that I wanted to do that, or that I would even like the result when I was finished. I think this will work just fine, and was way quicker and easier to finish. And the border fabric has little starbursts on it, so that's sorta like twinkle lights, right?
No more Lori Holt blocks for me anytime soon, except maybe making the giant train block baby quilt I mentioned earlier. Her blocks are cute and all, but they just have way too many pieces!
As you can see from the picture above, I opted not to make the Twinkle Light border. It would have required me to make 44 individual 3-inch light bulb units and I just wasn't convinced that I wanted to do that, or that I would even like the result when I was finished. I think this will work just fine, and was way quicker and easier to finish. And the border fabric has little starbursts on it, so that's sorta like twinkle lights, right?
No more Lori Holt blocks for me anytime soon, except maybe making the giant train block baby quilt I mentioned earlier. Her blocks are cute and all, but they just have way too many pieces!
Vintage Christmas block for September
After cutting things so close last month, I decided to go ahead and knock out my blocks early this time. The two blocks that I made from this month's assignment were, from left to right, Vintage Ornament and Under the Tree. We were also assigned the Twinkle Lights block, which I was going to use as a border, but I decided to wait until I got the top finished to the point of needing the border before I decided or made any of them.
Friday, August 23, 2019
August Vintage Christmas blocks
This month in our Vintage Christmas block of the month class (aka Moda class) we were assigned 5 blocks, as usual, but I actually needed 3 of them this time. From left to right, the blocks are: Taffy, Stocking, and Toy Train.
The first two I did in the featured colors (though not the featured fabric), but with the train, I decided to switch things up a bit. The original had the train in dark and light blues, but I decided to go with gray and black. I had dark and light blue (the light blue is in the Taffy block and the dark blue is in the Stocking block), but I thought the gray and black would look better than the specific blue fabrics that I had. I was afraid there wouldn't be enough contrast between the blues.
I really like the train block, in general, so I'm thinking that I might use the design to make a large block baby quilt. I've already figured up the cutting directions to enlarge it to a 36 inch block. I'm not sure when I'll get around to making it, though.
I was really cutting it close getting the blocks done this month. For me it was more important that I get the wedding quilt top finished (featured in the previous post) so I could leave it to be quilted, than to get the blocks done, so I worked on the wedding quilt first. Once it was finished, then I shifted over to the blocks. I finished them the night before the meeting. It all worked out in the end, since I got them all finished in time.
The first two I did in the featured colors (though not the featured fabric), but with the train, I decided to switch things up a bit. The original had the train in dark and light blues, but I decided to go with gray and black. I had dark and light blue (the light blue is in the Taffy block and the dark blue is in the Stocking block), but I thought the gray and black would look better than the specific blue fabrics that I had. I was afraid there wouldn't be enough contrast between the blues.
I really like the train block, in general, so I'm thinking that I might use the design to make a large block baby quilt. I've already figured up the cutting directions to enlarge it to a 36 inch block. I'm not sure when I'll get around to making it, though.
I was really cutting it close getting the blocks done this month. For me it was more important that I get the wedding quilt top finished (featured in the previous post) so I could leave it to be quilted, than to get the blocks done, so I worked on the wedding quilt first. Once it was finished, then I shifted over to the blocks. I finished them the night before the meeting. It all worked out in the end, since I got them all finished in time.
Split Stars Wedding Quilt
My oldest step-daughter is getting married in November, so as a wedding gift, I'm making a quilt for her. She picked out the fabric and the pattern. The fabric is Something Borrowed by Christopher Thompson for Riley Blake fabrics. I purchased mine from the Fat Quarter Shop, and I was really happy with the experience. The fabric shipped and was delivered very quickly (unlike my recent experiences with Missouri Star Quilt Company). The fabric seemed to be accurately cut and very neatly packaged, so I was pleased all around.
The pattern she chose was called Split Stars from A Bright Corner. The pattern actually features this fabric, so it was really easy for her know what the finished quilt would look like ahead of time. I've never done a quilt in the featured fabric before, so this was a first for me. I'm usually not a "paint by number" kind of girl, but it did make the whole process go a little easier, because all of the decisions were made for me ahead of time. And when I'm making something for someone else, it's nice to not have to make the decisions. This way I know it's something she will like.
I dropped the quilt off at the quilt shoppe on Wednesday to be quilted. Hopefully they will get to it in time for me to get it bound before the wedding. Fingers crossed.
The pattern she chose was called Split Stars from A Bright Corner. The pattern actually features this fabric, so it was really easy for her know what the finished quilt would look like ahead of time. I've never done a quilt in the featured fabric before, so this was a first for me. I'm usually not a "paint by number" kind of girl, but it did make the whole process go a little easier, because all of the decisions were made for me ahead of time. And when I'm making something for someone else, it's nice to not have to make the decisions. This way I know it's something she will like.
I dropped the quilt off at the quilt shoppe on Wednesday to be quilted. Hopefully they will get to it in time for me to get it bound before the wedding. Fingers crossed.
Monday, August 05, 2019
Five Easy Pieces baby quilt
This little quilt is a variation on a Five Easy Pieces Charity Quilt I found online. In the original quilt, the blocks were like a single round of a Log Cabin block, but one of the commenters suggested that she would make all the bricks around the center the same size and put it together with partial seams. I liked that idea and decided to try it.
I wanted to be able to use fat quarters and I wanted to make as efficient use of the fabric as I could. That is one reason why I wanted to use the one size brick and partial seams method. That way I could cut all the fat quarters the same way and make all of the blocks the same. The original pattern made a 12 inch block, but I scaled it down to a 9 inch block so that I could get enough pieces from the fat quarters to make a reasonably sized and shaped quilt. The quilt finishes at 37 inches by 47 inches, which I think makes a nice sized baby quilt.
This quilt uses 4 fat quarters for the blocks, along with some white yardage. The fat quarters are ones that I won from our monthly drawings at the Moda class I attend at the Front Porch Quilt Shoppe, and the white yardage was left over from a previous project. All I had to buy for the quilt was the border fabric, binding fabric, backing fabric, and batting. I'm not sure yet what I'll do with it, but I think it would make a nice little quilt to donate somewhere, possibly.
Saturday, July 06, 2019
Sparkle block
Today I made my 6-inch Sparkle block for this month's Block of the Month assignment. It was the only block I needed from the 5 blocks that were assigned this month. It's going to catch up with me soon, though. I think I will need to do 3 blocks next month.
I tried to be very careful with my cutting and sewing today. I measured each unit as I went, and trimmed down anything that wasn't exactly the size given in the measurements. For some reason, when I'm making the units, my units are always just a little bit bigger than what the directions call for. I know it's because I use a scant seam allowance when I sew, that's not surprising. What is surprising is that once I sew the unit together my completed block is usually just a little smaller than it should be. So why are the units bigger, but the finished block is smaller? I use the same seam allowance guide on all of them. It's not a MAJOR difference, usually 1/8 of an inch or less, but still, it's odd.
So I'm still not enjoying making the small blocks. In fact, I haven't been that enthusiastic about sewing in general lately, and this project doesn't help matters any. My original plan was to use the twinkle light blocks as a border, but I'd have to make 44 individual light bulb units, and I'm not sure I'm up to that. We'll see how I'm feeling when I get to that point, but it doesn't look promising.
I tried to be very careful with my cutting and sewing today. I measured each unit as I went, and trimmed down anything that wasn't exactly the size given in the measurements. For some reason, when I'm making the units, my units are always just a little bit bigger than what the directions call for. I know it's because I use a scant seam allowance when I sew, that's not surprising. What is surprising is that once I sew the unit together my completed block is usually just a little smaller than it should be. So why are the units bigger, but the finished block is smaller? I use the same seam allowance guide on all of them. It's not a MAJOR difference, usually 1/8 of an inch or less, but still, it's odd.
So I'm still not enjoying making the small blocks. In fact, I haven't been that enthusiastic about sewing in general lately, and this project doesn't help matters any. My original plan was to use the twinkle light blocks as a border, but I'd have to make 44 individual light bulb units, and I'm not sure I'm up to that. We'll see how I'm feeling when I get to that point, but it doesn't look promising.
Friday, June 28, 2019
Little Deer block
The only block that I needed for the June meeting of my Moda group was the Little Deer block. I actually finished it the day before the meeting. As it turned out, I didn't actually get to go to the meeting, because my husband and I had to make an unexpected trip to the urologist's office. (The ups and downs of prostate surgery recovery. Thankfully nothing too serious, but it's always better to be safe with these sorts of things.) But at least it was finished on time and I can show it at the next meeting. I even did the embroidery! Go me!
Tuesday, June 11, 2019
More Art!
A watercolor dandelion I painted for my mother's Mother's Day card.
Some abstract watercolor tulips.
A pencil drawing of a cat.
A pencil drawing of a lamp from a reference photo a tore out of a magazine.
An abstract watercolor cat face that I painted from a demo I found online.
A line-and-wash (ink and watercolor) magnolia that I did from a reference photo I took in my neighbor's yard.
A pencil drawing of my youngest granddaughter. I'm not including the reference photo because my stepdaughter is particular about sharing her photos online.
A watercolor ice cream cone that I painted for my husband's birthday card.
I like some of my efforts better than others, but I've been enjoying the learning experience.
Some abstract watercolor tulips.
A pencil drawing of a cat.
A pencil drawing of a lamp from a reference photo a tore out of a magazine.
An abstract watercolor cat face that I painted from a demo I found online.
A line-and-wash (ink and watercolor) magnolia that I did from a reference photo I took in my neighbor's yard.
A pencil drawing of my youngest granddaughter. I'm not including the reference photo because my stepdaughter is particular about sharing her photos online.
A watercolor ice cream cone that I painted for my husband's birthday card.
I like some of my efforts better than others, but I've been enjoying the learning experience.
Baby Boy Quilt finished
This one I quilted myself. It is done in diagonal lines through the darker patches of the four-patch blocks. I originally started marking it on the diagonal through all the blocks of the four-patch, but I decided that was too much quilting for a baby quilt. I like to keep them soft.
It is also machine bound, which I don't normally do. I attached the binding strips to the back instead of the front and turned it toward the front. I did a zigzag stitch on the top to hold the binding in place. It's not my preferred way of binding a quilt and not my favorite aesthetic either, but I don't hate it, so that's something.
Again, I finished this quilt last month (just 10 days from when I started it), and I'm just now getting around to posting about it. This year has been very hectic - two trips to Washington State, one trip to New Jersey, several trips to Dothan for doctor visits, my son's graduation in Tuscaloosa, and most recently my husband's surgery last week. I hope that the second half of the year is less eventful!
Subscribe to:
Posts (Atom)